Preparing a repository for collaboration
Preparing a Git repository to simplify technical writing and collaboration with other technical writers.
This is part of the step-by-step series to set up a technical writing environment with IntelliJ and the AsciiDoc plugin. See the page Setup for technical writing for an overview of all steps.
Prerequisites
This assumes that IntelliJ IDEA is already installed on the PC and a project is open. See Installing IntelliJ for technical writing and Opening a project in IntelliJ IDEA.
|
To set up these features, some proficiency with IntelliJ is beneficial. After the setup is complete and each file has been committed and pushed to the repository, those features will work for all other contributors without additional set-up activities on their side as long as they use IntelliJ and a recent version of the AsciiDoc plugin. Users new to IntelliJ should consider trying out these features with another IntelliJ user. |
Recipes for repositories
All these recipes describe files that can be committed to the repository. This is why this is called “configuration as code”.
After one person has added them to the repository, they’ll be effective for all contributors using IntelliJ once they receive these changes via the repository. When these files change, those changes are effective immediately when the other users receive those changes via the repository.
This simplifies onboarding of technical writers, and provides a smooth and similar working experience for every contributor.
Align the formatting across IDE installations with .editorconfig
If technical writers configured their IDE’s AsciiDoc formatting manually, this would be a tedious task and could lead to different configurations in different IDEs.
The solution is an .editorconfig file which commits the editor settings to the repository.
Most settings are about code formatting.
See the EditorConfig homepage to learn more about the concept.
Most of the configuration settings work across different editors, while settings starting with ij_ are specific to IntelliJ.
Each subfolder can overwrite the settings with its own file.
Only the top file must contain root = true.
.editorconfig file with the default settings# Value "true" marks the top configuration file in the project
root = true
# The following settings match to AsciiDoc content by its filename
[{*.ad,*.adoc,*.asciidoc,.asciidoctorconfig}]
# Ensure that content is UTF-8 encoded
charset = utf-8
# No line should contain trailing whitespace
trim_trailing_whitespace = true
# Ensure a newline at the end of each file
insert_final_newline = trueThe AsciiDoc plugin supports reformatting settings which can be configured via this file as well. See Reformatting Content for details.
See the IntelliJ docs about EditorConfig support for further information.
Provide hints for the preview with .asciidoctorconfig
When working in a larger project, the content is often broken down in several files which are included in one or more parent documents using include::[] preprocessor macros.
This can lead to a situation where the attributes are defined in a parent document, and are not available in the sibling documents. This results in a preview that shows only the attribute names, but not their value, which makes it less useful for technical writers. Also, images might not show in the preview, as the folder for images is not specified.
To provide those attributes as a hint for the preview, consider adding an .asciidoctorconfig file.
This can be added to any folder of the project, and will be prepended for rendering the preview for all AsciiDoc files in that folder and its subfolders.
Other IDEs like Eclipse and VSCode support this file in a similar way, although support may vary.
:myprojectname: Awesome product (1)

:experimental: (2)
:icons: font

:imagesdir: {asciidoctorconfigdir}/images (3)| 1 | Define a custom attribute. |
| 2 | Define attributes that enable Asciidoctor features and rendering. |
| 3 | Specify the location of the images. The attribute {asciidoctorconfigdir} points to the folder with the .asciidoctorconfig file, and in this example /images contains all images. |
After this change, the attribute value {myprojectname} will show as Awesome product, the :experimental setting enables macros like the kbd:[] macro, and images in the sub-folder images will show in the preview.
See Asciidoctor Config File for more information.
Custom styling for the preview
When editing an AsciiDoc file in IntelliJ, the AsciiDoc plugin renders a preview with a default stylesheet. For regular AsciiDoc content, it uses the classic Asciidoctor stylesheet. For Antora content, it uses the default Antora stylesheet.
This leads to a situation where the final CSS of the site is different from the preview. To solve this, configure the IDE to use the CSS of the regular website for the plugin’s preview.
A minimal setup can add the stylesheet information to a file .asciidoctorconfig in the root folder of the project:
:linkcss:
:stylesdir: https://intellij-asciidoc-plugin.ahus1.de/docs/antora/css/ (1)
:stylesheet: preview.css (2)| 1 | Replace this URL with the site’s URL and path to the CSS file. |
| 2 | Replace the file with the preview CSS file. |
When sites use several CSS files, the recommended approach is to create one CSS file that combines all CSS files for the preview. That file could also include customizations for a good preview, like adjusted borders and workaround for font handling. This file needs to be added by the person maintaining the website.
@import "site1.css";
@import "site2.css";

/* workaround for browsers that don't allow relative URLs when the page is opened as a file:// */
@font-face {
    font-family: ...
    src: url('https://example.com/');
}

/* skip the space at the top in the preview where the menu bar is on the production site */
body {
    padding-top: 0
}
See Custom stylesheets for the preview for more information and variants.
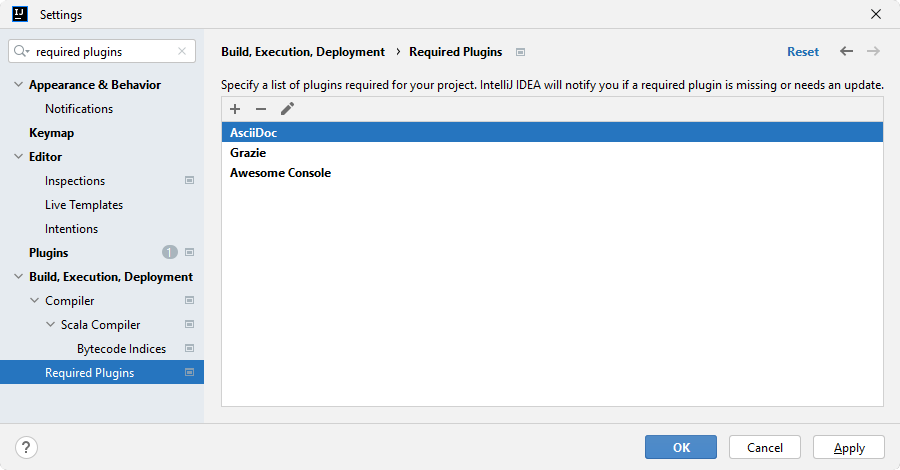
Specifying required plugins
A repository can contain a special file .idea/externalDependencies.xml to list all required plugins to work with the project.
When a users open the repository, IntelliJ prompts to install those plugins.
Access the setting via . Use the icons , and to add, remove and edit the required plugins.
Once everything is set up, commit the file .idea/externalDependencies.xml to the repository.
In most projects, the folder .idea is excluded and none of the files will be committed.
To change this for IntelliJ for a Git repository, update the following settings in the .gitignore file which is usually in the root folder of the project.
# Ignore everything in the '.idea' folder from the versioning
.idea/*
# Stil, allow the file 'externalDependencies.xml' in the folder '.idea'
!/.idea/externalDependencies.xml
For each plugin, a minimum and maximum version can be specified. This can encourage collaborators to update to a minimum version if the project requires the latest features or bug fixes of a plugin.
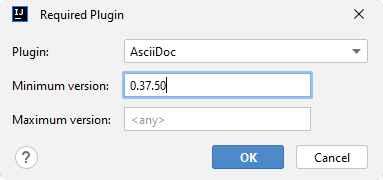
Read more in the IntelliJ docs about Required Plugins.
Further reading
Continue to Using Antora with IntelliJ for the next step of this series.